$5000 Kitchen Remodel – How We Updated Our Kitchen with An Extremely Low Budget

Did you know that most kitchen remodels cost around 15% of the home’s worth?
With a median price of $900k for a single-family home in Seattle, a kitchen remodel could easily cost upwards of $80k. And while I could easily spend that on a kitchen remodel, when it came to our kitchen; we needed to be as savvy as possible.
So in this post, I’m going to talk about how we were able to update our kitchen for only $5k, and I’m also going to break down all the costs of materials and tools!
Sound like a plan?
Ok, here’s what we did and how we did it…
Four major factors led to us only spending $5000 on our kitchen remodel! Those four factors being:
- We didn’t add additional cabinetry. If we were planning to stay in this house long term, I would have added more uppers above the existing ones, plus way more storage in the bar area.
- We already owned many of the tools we needed. like saws, screws, clamps, drills and drill bits, an air compressor, level, etc. If there was a special tool, we needed for this project; I listed it below in the cost breakdown.
- We didn’t purchase a new fridge. I feel that this is worth mentioning because this was a big reason we could keep the costs so low. Since we decided that we’re going to sell soon, and you don’t technically need appliances to list your home, we sold the home without one. It was an added benefit for us because the kitchen appears much larger without one.
- We did 90% of the work ourselves. This was another big reason that we could do this for under $5k. We had more experience with a few other household renovations and DIY decor projects, so we were prepared to take this on. If you’re new to this blog, check out some of my past DIY projects after you read this post.
Ok, now let’s talk about how we did it in a little more detail.
I broke down our kitchen makeover into four categories: the countertop, cabinets, appliances, and floors. And I’ll discuss all of those below, along with a cost breakdown of each.


1. The Countertops
As I mentioned earlier, our budget was tiny for this remodel, so I knew that any type of stone countertop was out of the question.
Trust me, I would have loved a quartz or soapstone countertop, but to be super budget-friendly, there were only a couple of options that were worth considering…. and those being laminate and butcher block.
I love the look of butcher block, but trying to locate one in stock was impossible. The next material I looked into was laminate. There are some surprisingly gorgeous laminate countertops these days. Laminate has come a long way from what we typically think about…. but it is still laminate after all. After going to a showroom, I saw a laminate from Wilsonart that looked like a butcher block. To our disbelief, it looked perfect.
And after weighing the pros and cons, we went with laminate countertops. I know… I know… I can’t believe it either.
As for installation, we followed a couple of YouTube videos (that we watched a few dozen times) and ordered an entire laminate kit from Cabinet Makers’ Warehouse. Since the original countertops were laminate, we ripped those out and created a new sub-base for our countertop from a couple of pieces of particleboard and 1x2s.


2. The Cabinets
The cabinets ended up being the craziest task we took on. Instead of gutting our entire kitchen and putting in brand new cabinetry or adding additional cabinets, we only swapped out the door and drawer fronts, which saved thousands of dollars just on its own.
Finding new door and drawer fronts was pretty straightforward. There are plenty of companies to choose from with a quick google search. After getting a couple of quotes, I found out that most companies charge by square footage.
The quotes I got back were around $50 per door and $35 per drawer. Not bad.. but after some research, I stumbled upon an Etsy shop called Raile Cabinetry that makes shaker-style doors and drawer fronts. And for only $10 per square foot!! That was HALF the price of the other companies. Plus, I love supporting small businesses, so that was a simple decision. Working with Raile Cabinetry was extremely easy, and they are super helpful. Just provide them with your measurements and they build you ones the same size as your old ones!
Getting the fronts figured out was one thing, but there were a couple of things to figure out for the new door and drawer fronts: hinges and paint.
After the new door and drawer fronts were ordered, the next step was figuring out how to paint them. After getting a couple of quotes from local painters for $3k and $5k, we took the matter into our own hands.
In hindsight, I would’ve had Raile Cabinetry paint them before they shipped. But we didn’t do that, so here’s what we did…
We sprayed the door and door fronts with a Wagner sprayer. This was our third paint sprayer, and we love this one for small projects!
My husband built a temporary painting booth in our carport with plastic tarps. (I’m sure our neighbors loved us lol) Then he primed and painted every single one. We used a Benjamin Moore primer, and for the paint, we used a Benjamin Moore paint that was color matched to Rock Bottom by Sherwin Williams.
Tips for painting cabinets the DIY way:
- Prime your cabinets. Since the doors and drawer fronts from Raile Cabinetry are made with MDF, priming them is essential. The MDF soaks in a ton of paint. We used Fresh Start by Benjamin Moore for our primer, but really… any good primer will work.
- Paint. The quality of the paint here matters tremendously. After loads of research, we ended up using Benjamin Moore Advanced Paint in a Satin Finish. And I couldn’t recommend this paint enough!! It’s self-leveling, so it dries flawlessly. I’ve had issues in the past with other satin or semi-gloss paints, and this one by Benjamin Moore is perfect. It was very forgiving with any touch-ups I needed to make, and it was super easy to paint with.


3. Appliances & Plumbing Fixtures
We weren’t planning on updating the appliances, but once we started replacing some stuff, there was no way we could put the old appliances back in. So I took it upon myself to find the most inexpensive appliances possible. I looked regularly on Facebook Marketplace, Craigslist, and local outlet stores until we found the perfect thing.
I ended up frequenting a Best Buy Outlet over the course of a month, and it paid off! First, I found an LG range for under $700, and after going back a couple more times, I hit the jackpot and found a matching dishwasher for $400!
We also purchased a stainless steel drop-in sink and faucet on Amazon. Installing the sink and faucet was super easy and straightforward. The only tricky thing for us was that we went from a two-bowl sink to a single-bowl sink. That meant we had to do some simple plumbing in order to make it work.
As I mentioned earlier in this post, we decided not to buy a new refrigerator. The wall where a refrigerator would sit is only 24″ deep, so most refrigerators would end up looking super bulky, making the kitchen feel smaller than it is. An integrated counter-depth refrigerator would look the best, but that definitely wasn’t in the budget. And since we didn’t need one to list the house, we lived with an apartment-size fridge until the house was on the market and sold the house without a refrigerator.


4. Flooring
Flooring is the only thing we hired out for! Looking back, I’m proud to say this…. but in the middle of the project, we were both singing a different tune. For the floor tile, I chose a 12×24 ceramic tile, and I had our contractors lay it in a herringbone pattern.
Although looking at the price, hiring out for the floors was almost HALF of the entire $5k cost!
5. Other small projects
Another thing I want to touch on is that we added the ‘bar’ area in the kitchen. This obviously required material to build, like 2x4s and drywall, but I didn’t account for it because we used every 2×4, scrap wood, and drywall we had lying around! Literally… we built it using the very last 2×4, we owned. It was SO meant to be!
Other than that, we also painted the walls and touched up the trim around the windows.

PAINT
- Tricorn Black in Matte- HGTV HOME by Sherwin-Williams = $50/gallon
- Pale Bloom in Eggshell- HGTV HOME by Sherwin-Williams Pale Bloom = $50/gallon
- Pale Bloom in Satin- HGTV HOME by Sherwin-Williams Pale Bloom = $50/gallon
- Custom Color- Sherwin Williams “Rock Bottom Satin mixed in Benjamin Moore Advance Cabinet Paint in Satin = $120 ($60/gallon)
PAINT TOTAL: $270
MATERIAL COSTS
- LG Range via Best Buy Outlet = $700
- LG Dishwasher via Best Buy Outlet = $400
- Sub-base for countertops 2 sheets of MDF + 3 1x2s = $110
- Shaker Drawer and Door fronts via Raile Cabinetry on Etsy = $420
- 4 sheets of 4×8 laminate- Old Mill Oak from Wilsonart via Cabinet Maker Warehouse = $400
- Laminate glue via Cabinet Maker Warehouse = $26
- Matching Caulk for Laminate via Cabinet Maker Warehouse = $26
- Primer via Benjamin Moore 1 Gallon = $30
- Advance Cabinet Paint (Satin) via Benjamin Moore -1 Gallon = $65
- Brushed Brass Pulls via Amazon = $32
- Brushed Brass Knobs via Amazon = $18.99
- Concealed Hinges – Set of 4 (used on upper cabinets) via Amazon = $32
- Concealed Hinges via Rockler 3x $14.99 = $44.97
- Wall Paint via Lowes = $85
- Backsplash via Home Depot = $60
- Stainless Steel Drop-in Sink via Amazon = $220
- Stainless Steel Kitchen faucet via Amazon = $60
MATERIALS TOTAL: $2730
LABOR COSTS
Tile floors + grout + labor = $2000
(Actual tile isn’t available anymore) Here are some similar tiles: Nepal Gray Tile, Odessa Beige Tile, OR Marbella Desert Sand Tile
LABOR TOTAL: $2000
TOOL COSTS
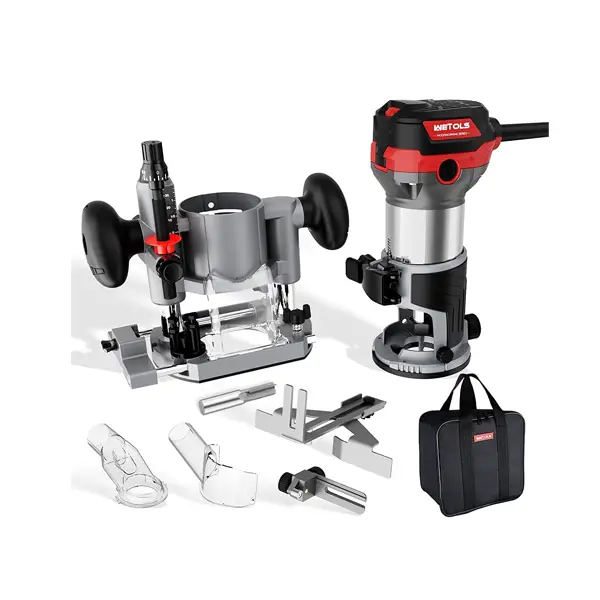
- Router Set via Amazon – $140
- Wagner Flexio 590 Paint Sprayer via Amazon – $159
- Hinge Jig Kit via Amazon – $28
- Cabinet Hardware Jig via Amazon – $20
- Nail gun via Amazon – $40
TOOL TOTAL: $387


There you have it! How we updated our kitchen on an extremely low budget! Whoa, that was a lot to get through.
I don’t recommend remodeling a kitchen like this; however, this is how we did it. And fortunately, it worked out great! So maybe sometimes a time crunch is a good thing?
The last thing I should point out before we get into this whole thing is that we didn’t plan any of this… (at least to this extent). Truthfully, I only had about three weeks to plan and purchase everything!

