Update: Our Modern DIY Side-Yard Makeover

A couple of weeks ago I wrote a blog post going over all of my crazy plans for transforming our large side yard into a usable space. That included a new patio and pathway, a feature fountain, and a trellis… just to name a few.
Since I wrote that post, a lot has been going on and we’ve made some major headway in the yard! So I thought this would be a good opportunity to do a little show and tell and share how things have been going!
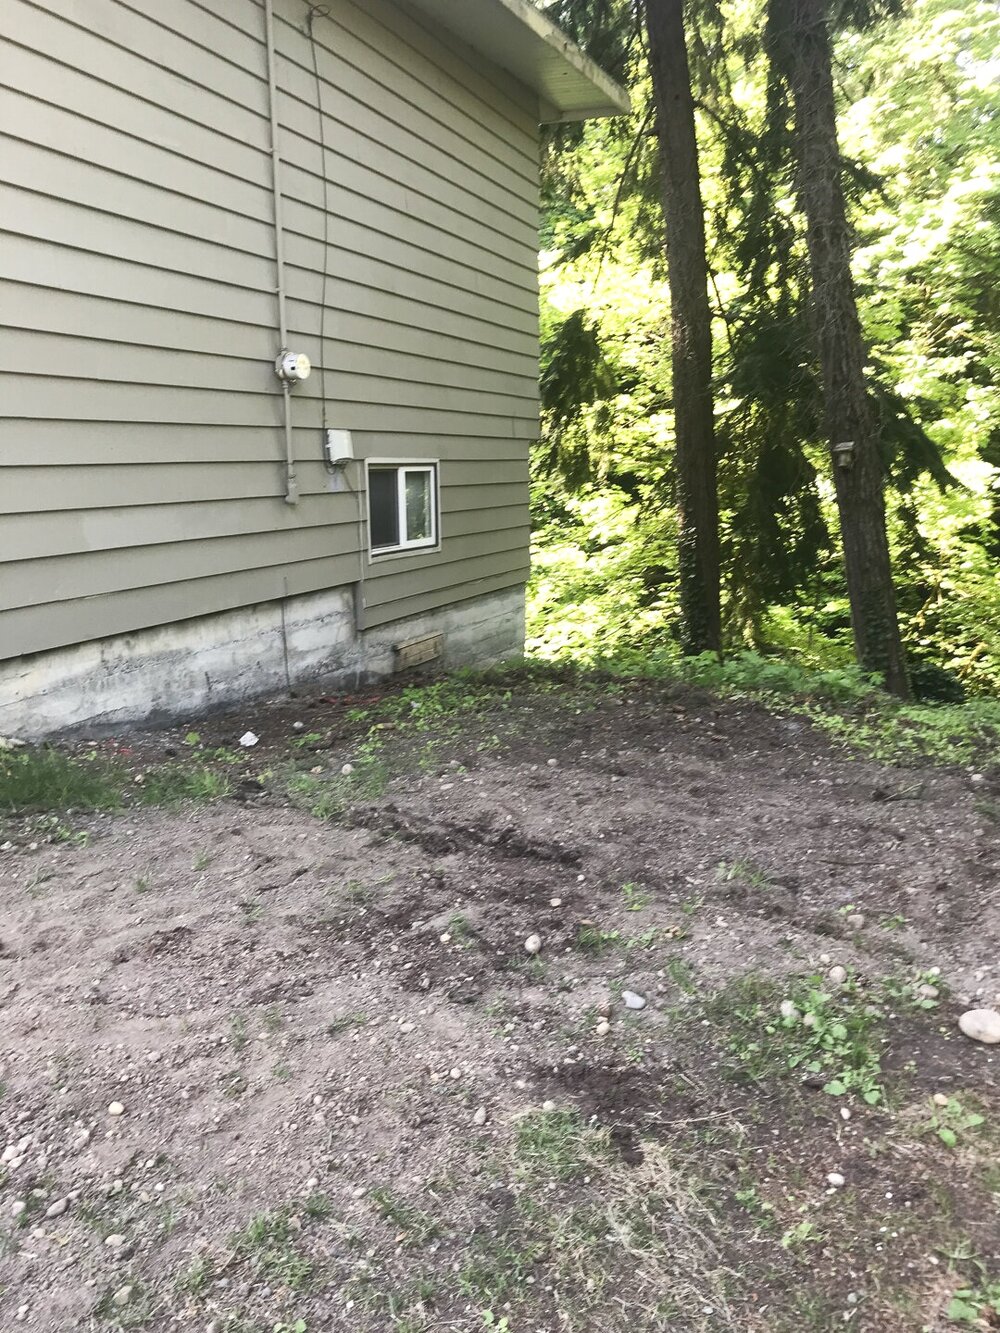
Let’s start with some before photos. Those are always fun, right?

The Paver & Gravel Patio
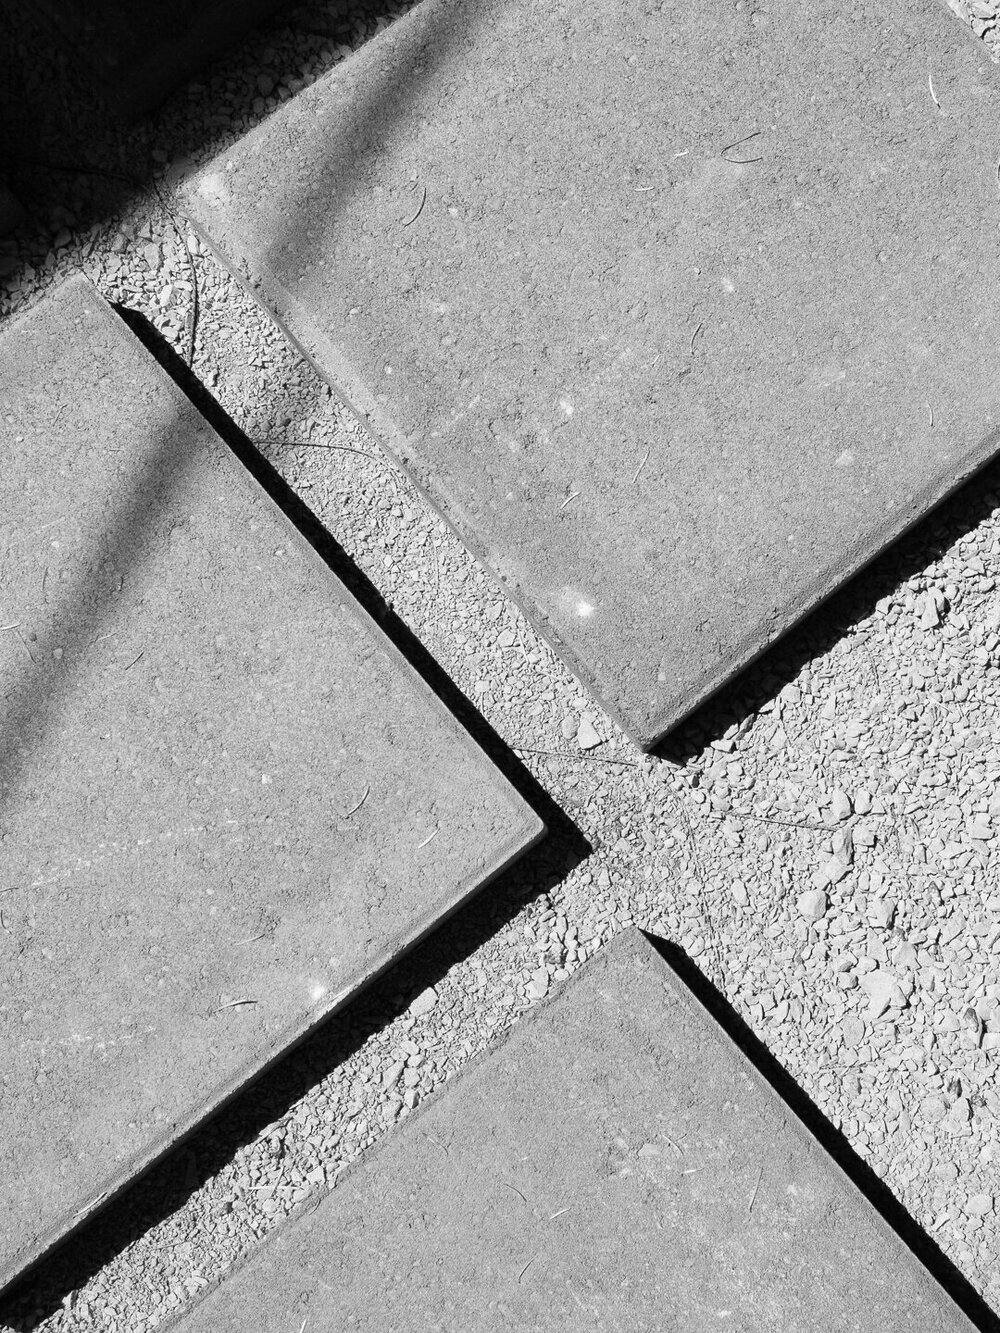
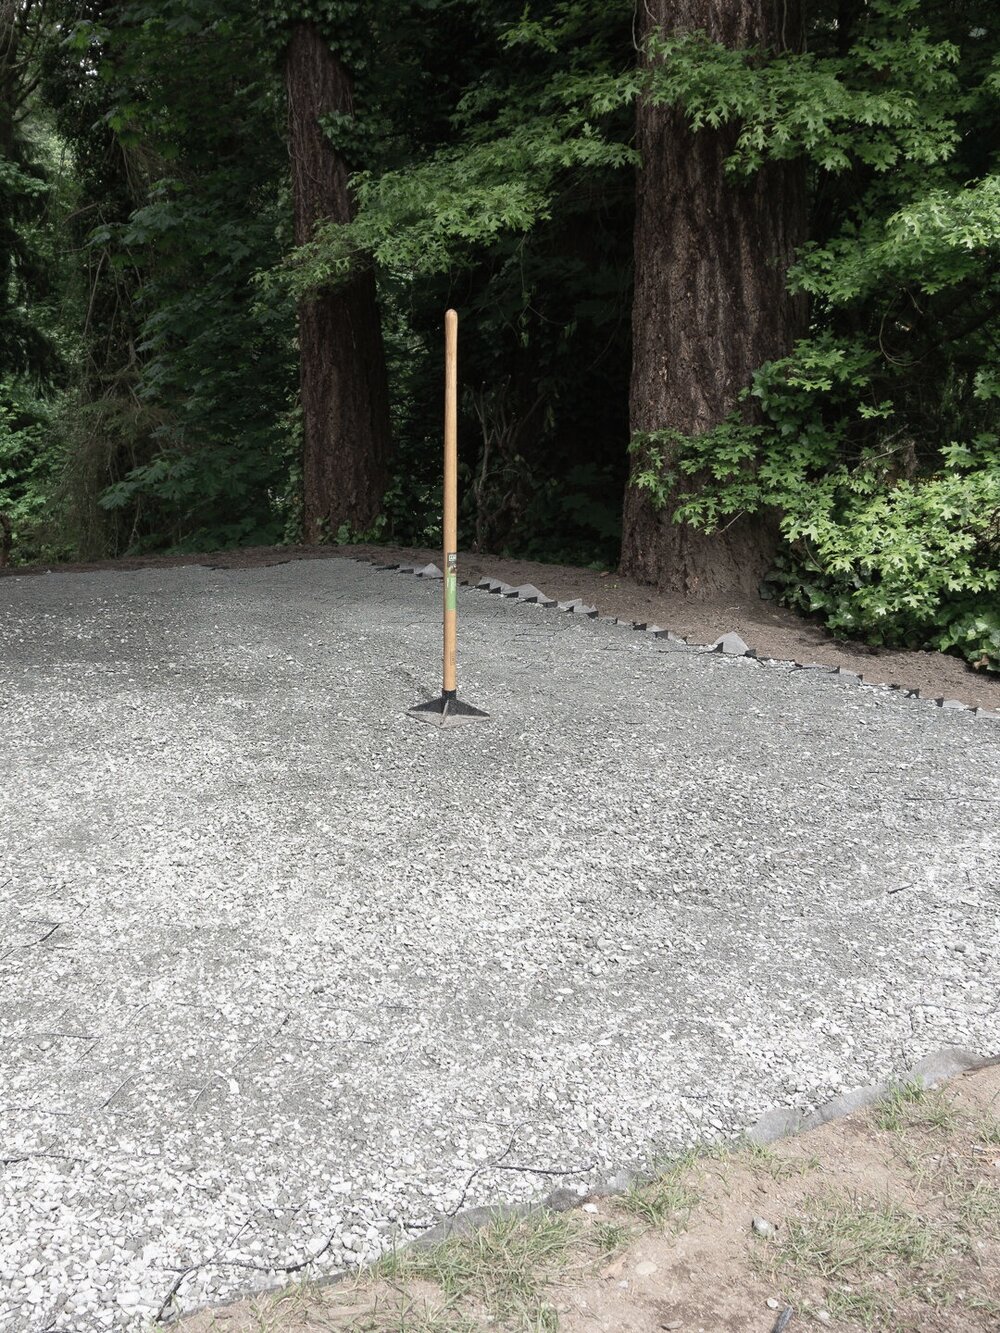
Installing a paver/ gravel patio is by far the biggest project we’ve taken on, and I’m SOOO happy to report that it’s almost finished! This project was no joke… it’s been a serious labor of love.
You can see in the before pictures that the ground was extremely unlevel. So over the past few weeks, we leveled it out and ended up adding six yards of dirt!
That’s been the most time-consuming part… but it pays off to have a level foundation for a project like this.


After all the area was level, we installed a gravel stabilizing product called Geocell. It’s the black material you see in the photos.
I’ve had a couple of questions about this material, and I’ll write another post specifically about our process and why we used it. In short, they use Geocell in commercial and residential settings as a gravel stabilizer. It makes it so the gravel/dirt/grass (whatever you want to put in between it) compacts and it’s easier to walk on.
You can walk on it in heels, drive a car on it…anything! Cool, right?
It was super easy to install and once it’s staked in place; we filled it with gravel as a base for our pavers.
To finish up the paver patio, I just need to make a final decision about the rock to put in between the pavers….and I think I need your opinion on this one.
Do you think we should choose a decorative rock, like a charcoal-colored river rock? Or do you think we should just opt for small pea gravel?
I just can’t decide! I feel like a decorative rock would look beautiful, but the variation in color that the pea gravel has might hide more pine needles, therefore be less maintenance?
Let me know what you think I should do in the comments below


The Feature Fountain
Let’s move on and talk about the main focal point of the patio area…. the feature fountain! Do you remember my plans for making a modern fountain out of a planter? Well, it’s happening folks!
This black steel planter from AllModern inspired it all…. and it does not disappoint! This bad boy is large and in charge, standing around 27” high. It will be a focal point, to say the least!
It took a second to gather all the materials we needed to make the fountain, but now that we have everything, we can put it together!
We did a quick mockup to make sure everything was working properly and so far, so good.
Once we get some nice weather we’re ready for the final installation. Don’t worry, you know I’ll be sharing this project in way more detail soon! In the meantime, we still need to paint the sheet metal and bury the cord underground.
After it’s installed, I plan on adding some more black edging around the planter and filling it in with a ground cover. Just to add a little more greenery in an unexpected way.
Talk about the perfect setting for a morning cup of coffee or evening cocktail, right?!


The Freestanding Trellis
I didn’t go into too much detail about the trellis in my original plans, other than we’re adding one. So I’m super excited to share this part of the update with you.
I fell in love with diamond patterned trellises on Pinterest when I was looking for some inspiration, so I had to make it a reality.
We built this simple, freestanding trellis with some hammer-in footers, 4x4s, and some brackets. I’m also going to write a quick post about this project. It’s just too good not to share!
So far, we have it mocked up with some string to double-check the lines, and now we just have to install the actual wire and eyelets and make it permanent.
I can’t wait to see the vines start growing in that beautiful diamond pattern. I think it’s going to be an unexpected surprise once you walk back into that space, don’t you?
There you have it- that’s all the progress we’ve made on our side yard so far!
What do you think about everything we have going on?
I can’t wait to go into more detail about all the projects and show you how I’m going to style this space once it’s finished. It’s gonna be sooo good!
Stay tuned for each of those posts and so much more coming soon!