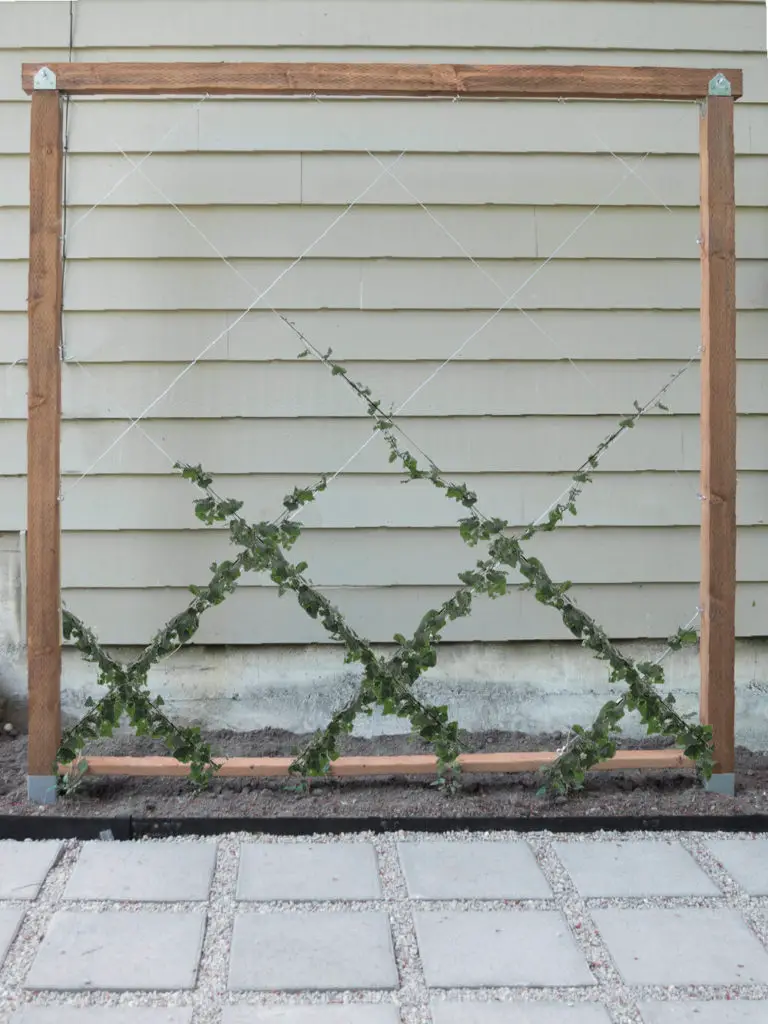
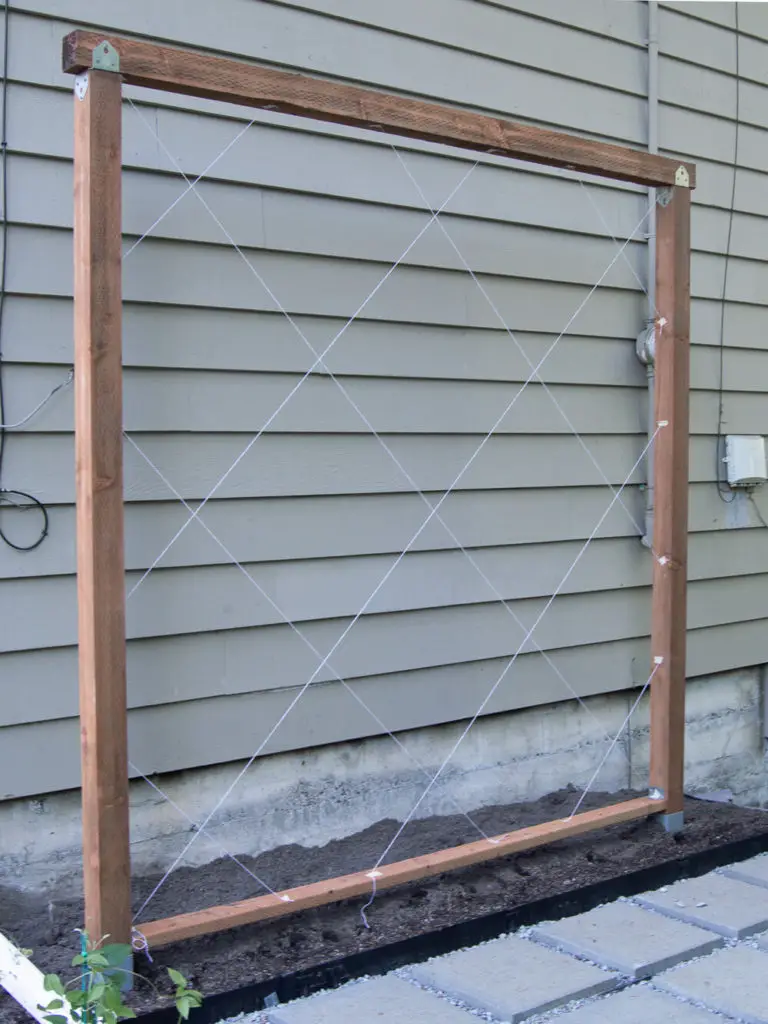
How To Make A Freestanding Diamond Trellis (with plans)
Don’t you love a trellis with climbing plants? They not only add some height and visual interest, but they provide even more greenery in an outdoor space, which is always a good idea, right?!
If you’ve been following my IG stories or saw my other blog posts about our patio makeover, you might have heard my plan for making a trellis to cover a big, bald spot on the side of our house.
After seeing a few DIY trellises on Pinterest, I did some research and racked my brain for a bit… then I came up with a game plan.
In short, here’s how I made a freestanding trellis with a diamond pattern-
How to make a freestanding trellis:
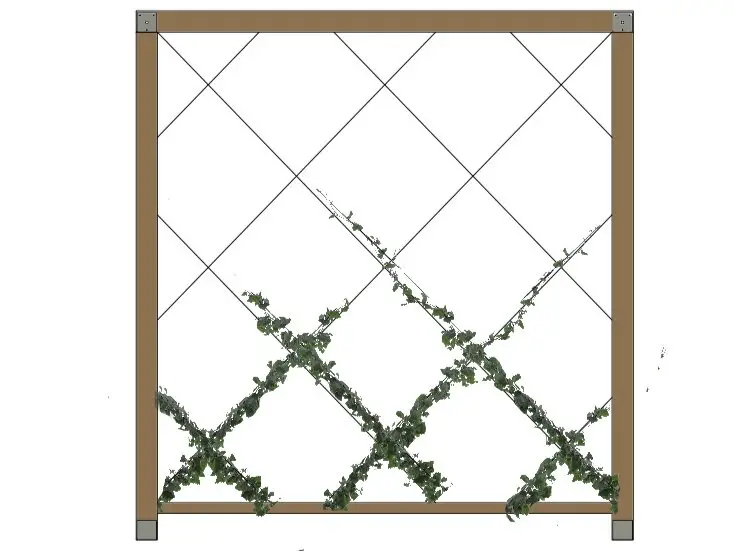
- Draw a plan for the trellis. Preferably to scale.
- Measure and place some stakes where each footer will go.
- Install two ‘post system’ footers.
- Place the 4×4’s in the footers and tighten with a bolt and nut.
- Install post caps on the vertical 4x4s and screw them into place.
- Install and secure the top 4×4 and bottom 2×4
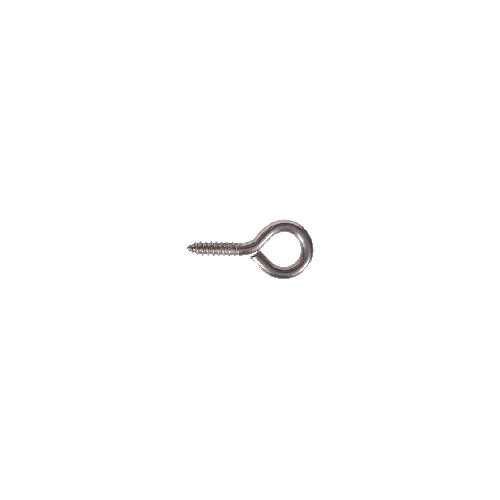
- Measure out the placement for the eyelets & make a mark.
- Mockup the diamond-shaped trellis with tape and string.
- Install the eyelets in the center of the beam at all the marks you made.
- Loop the wire around the eyelet with a ferrule and tighten. Crimp the ferrule to secure it.
- Install and the wires, following the schematic until it’s complete.
- Finish it by planting some climbing plants or vines!

The MATERIALS
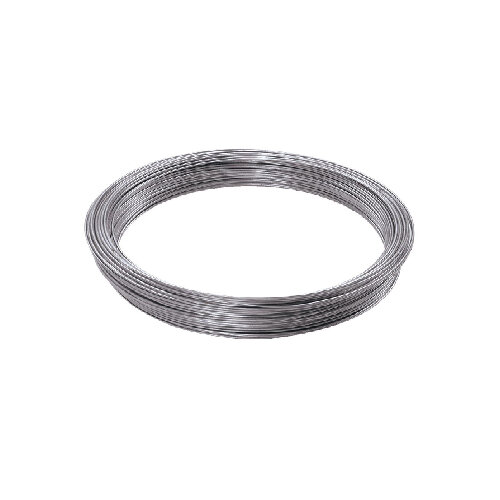
20 gauge wire via Home Depot
2- Groundsmaster Fence Post System via Home Depot (if the post system doesn’t come with hardware, you’ll need to purchase it separately) — 4 Stainless steel nuts, 4 Stainless steel bolts, 4 Stainless steel washers
Stainless steel eyelets via Home Depot
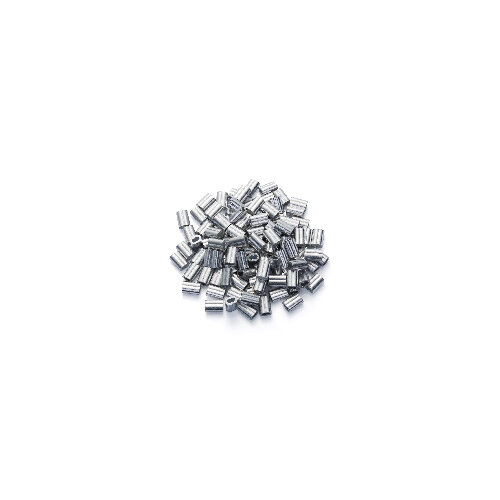
1/16” inch Cable Ferrule- via Amazon
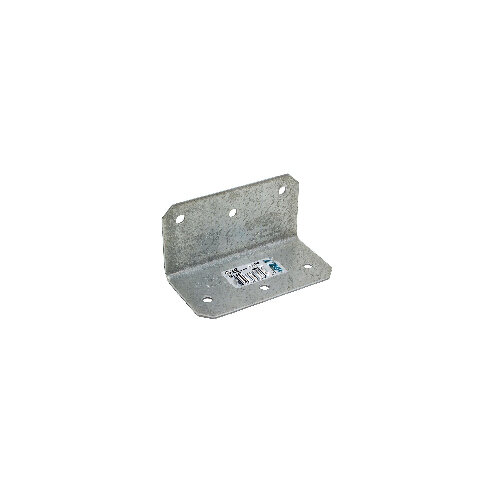
Galvanized 90 Degree Angle via Home Depot
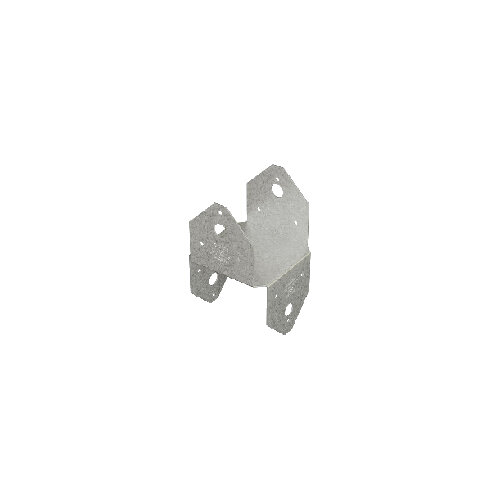
Galvanized Post Cap via Home Depot
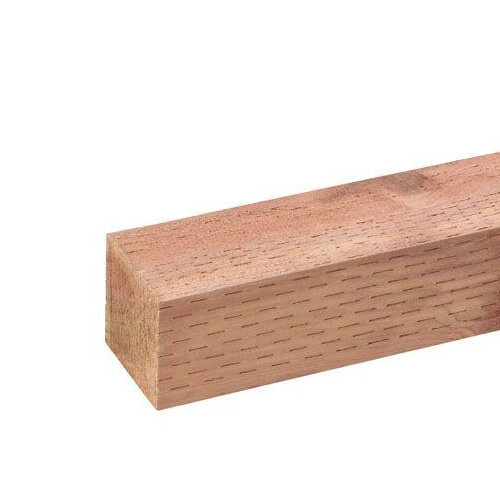
3- pressure treated 4x4s via Home Depot
1- Pressure Treated 2x4x8 via Home Depot
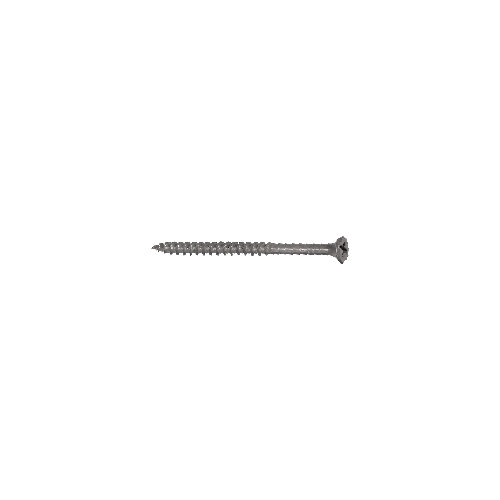
Exterior Deck Screws via Lowes

The TOOLS
2 pieces of scrap 2×4’s
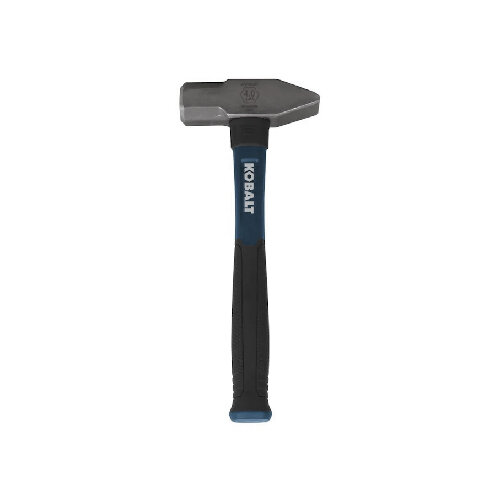
Hammer via Lowes
Adjustable wrench via Lowes
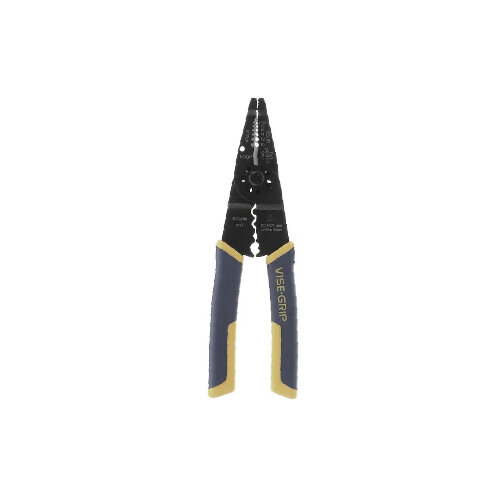
Wire cutter/stripper/crimper via Lowes
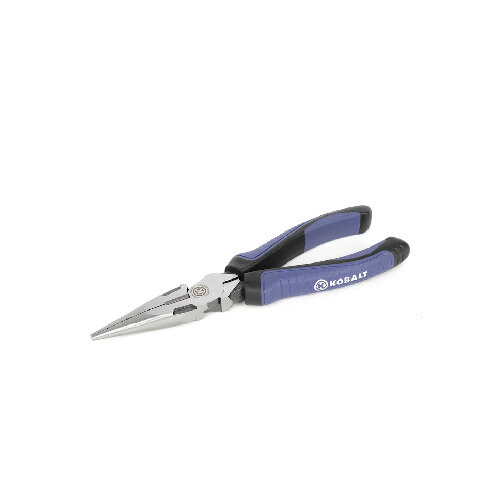
Pliers via Lowes
Cordless Drill via Home Depot
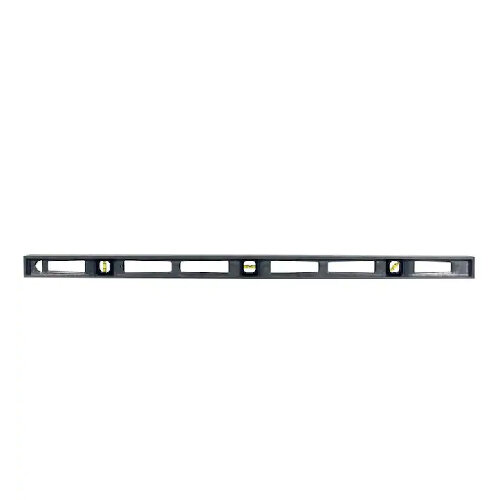
Level via Lowes
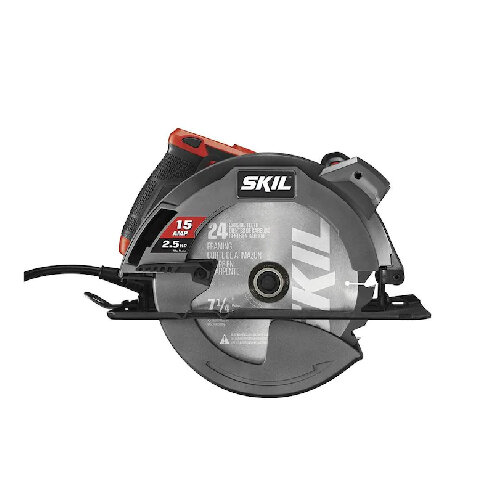
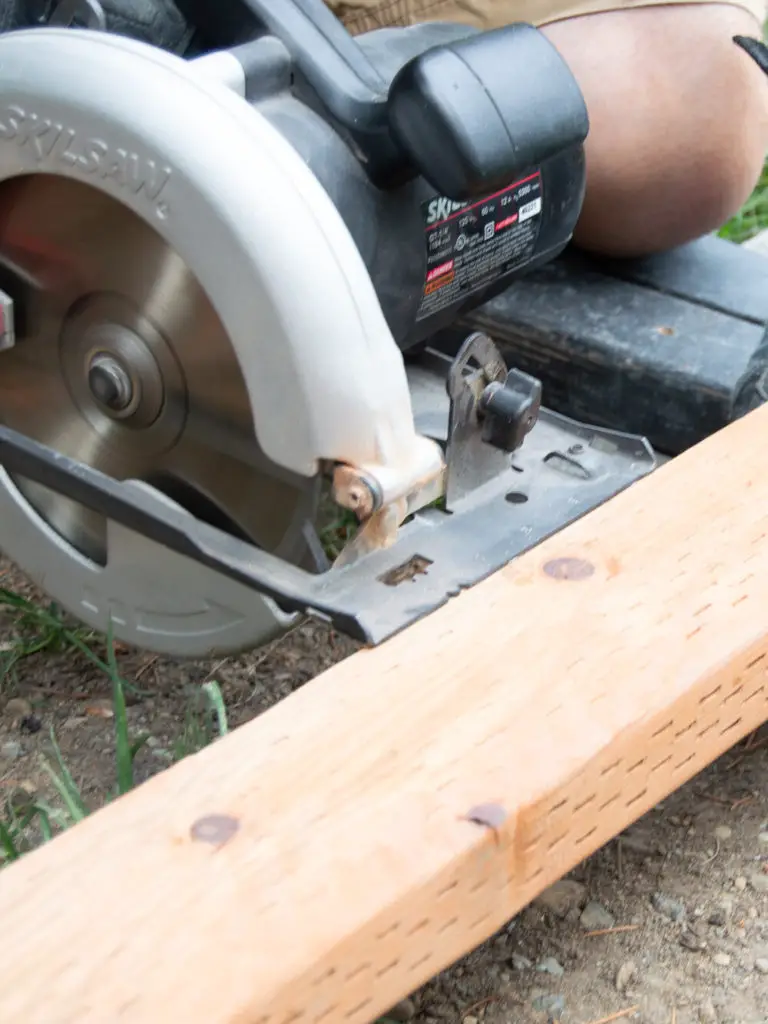
Circular Saw via Lowes
Alright, now that you know all the materials and tools I used, let me go into more detail and show you exactly what I did to make this freestanding trellis come to life!
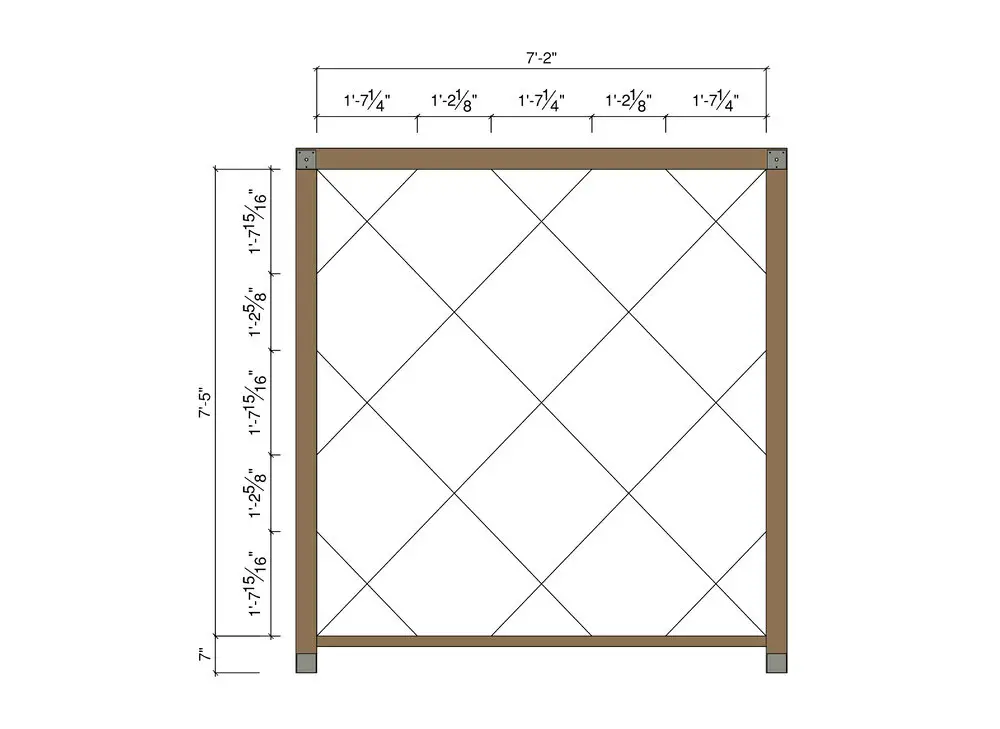
Step 1: Plan it out
The most helpful thing I did beforehand was to draw everything out. This is a non-negotiable, especially if you’re making a diamond-shaped pattern like I am. You can draw this up on some graph paper, or Sketchup if you’re tech-savvy.
I ended up spacing the wires 24” apart, and that made a pretty large diamond shape.
I tried spacing them at 18” and 20”, but I would have been left installing a bunch of short wires in the corners. It just didn’t look right.
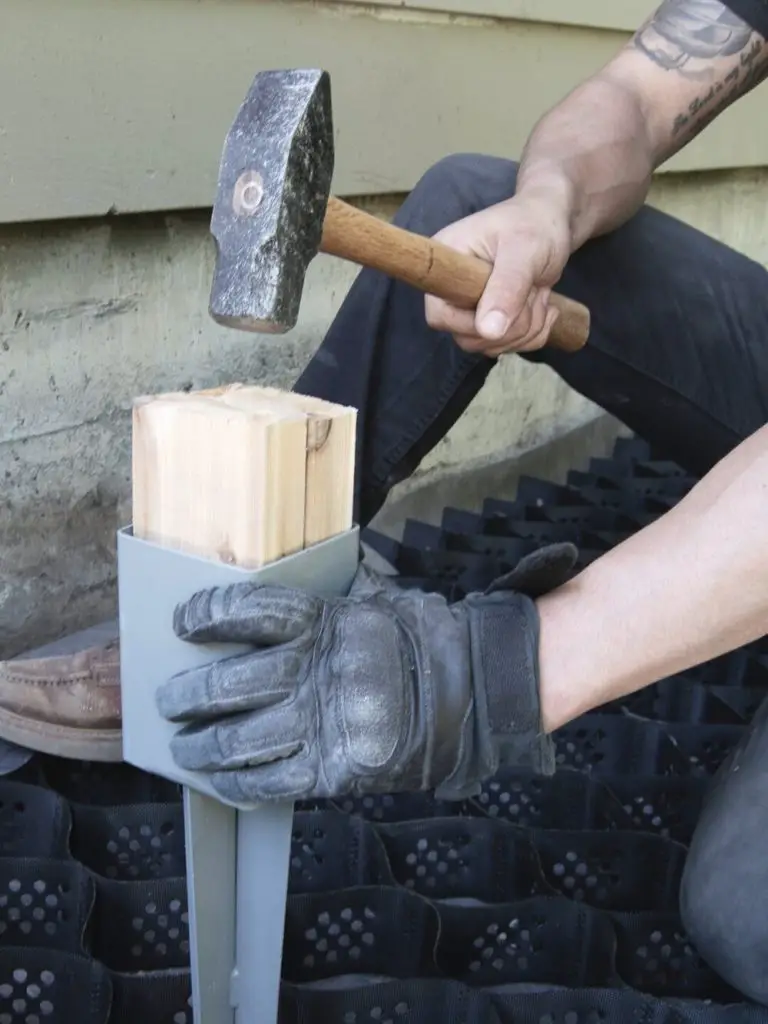
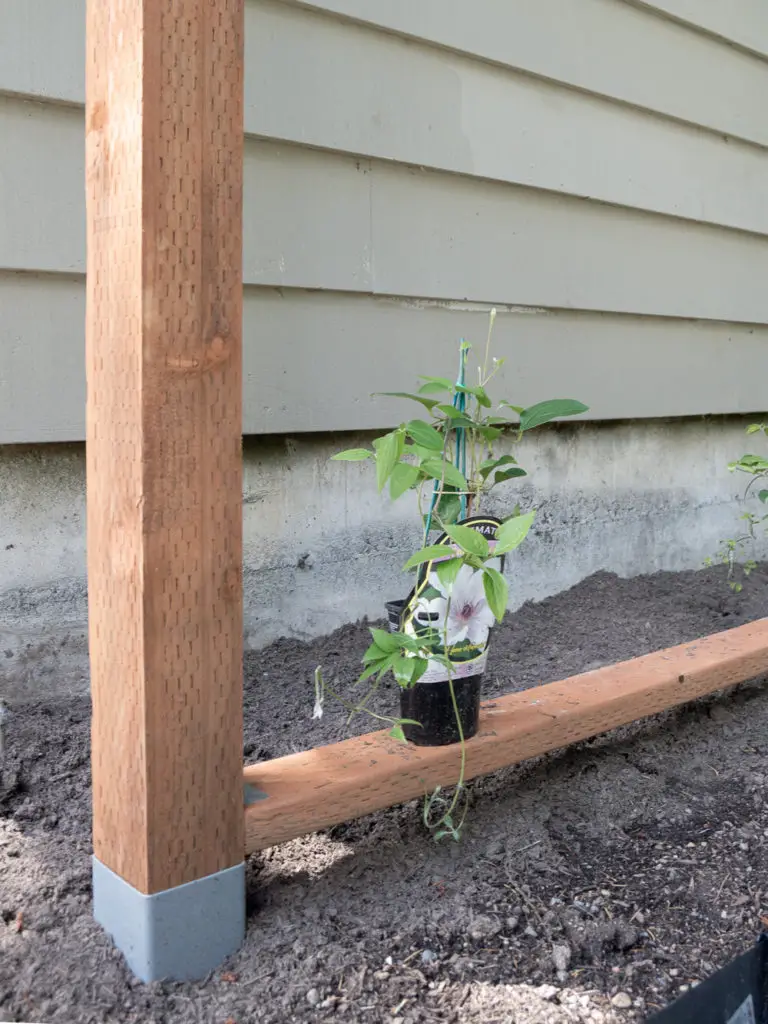
Step 2: Measure & install the footers
After you measure where you want to install the trellis, mark where each footer will go.
As for the footers… you could always dig a hole and pour concrete, but we ended up using no-dig footers for a fence because…hello?! No dig? Sign me up!
They come in 24” and 30” long, and we picked them up at Home Depot for about $25 each. Also inexpensive. A win-win!
To install them, place a couple of 2x4s in the center, and just hammer these into the ground. Maybe grab your husband for this, because I couldn’t do it on my own. Also…the 2×4’s will be destroyed by the time the footers are installed. So just a heads up.
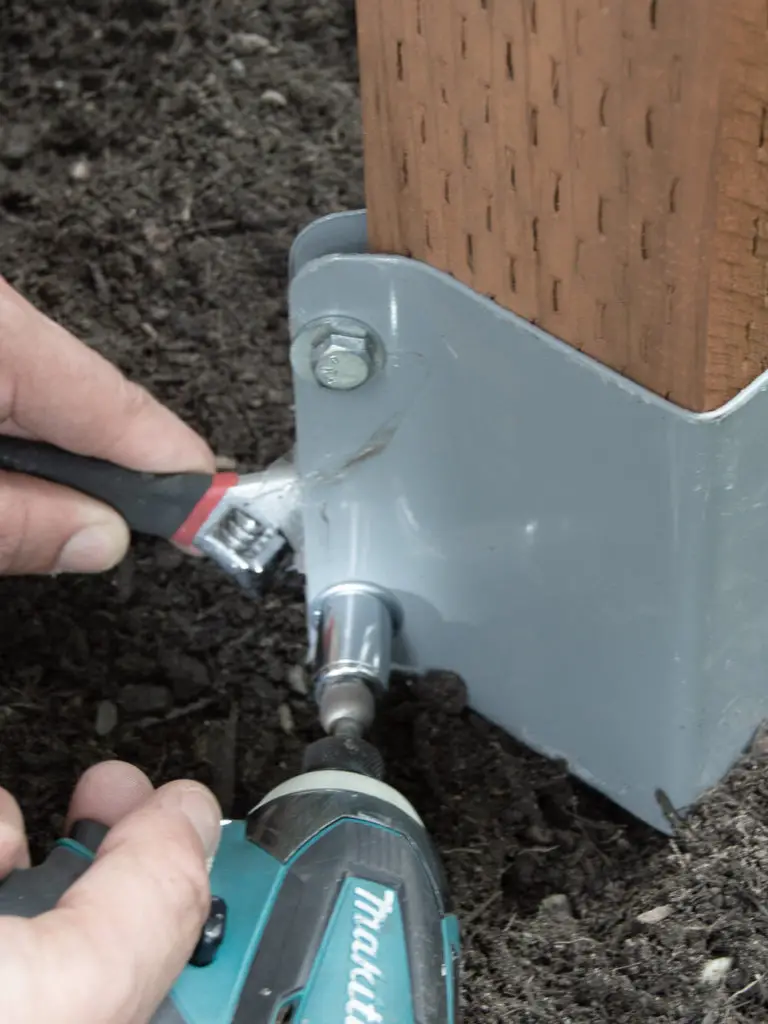
Step 3: Install the vertical beams
After the footers are hammered into the ground, place your 4x4s in the footers, and secure with a bolt and nut.
I noticed that some of these footers came with a nut and bolt, and others didn’t. Of course, I didn’t realize this until we got home, but luckily we had some hardware that worked for the other three, so it saved us another trip to the hardware store.
Case in point – look for ones that include the hardware, if possible.
To tighten them up, grab a wrench, and a cordless drill.
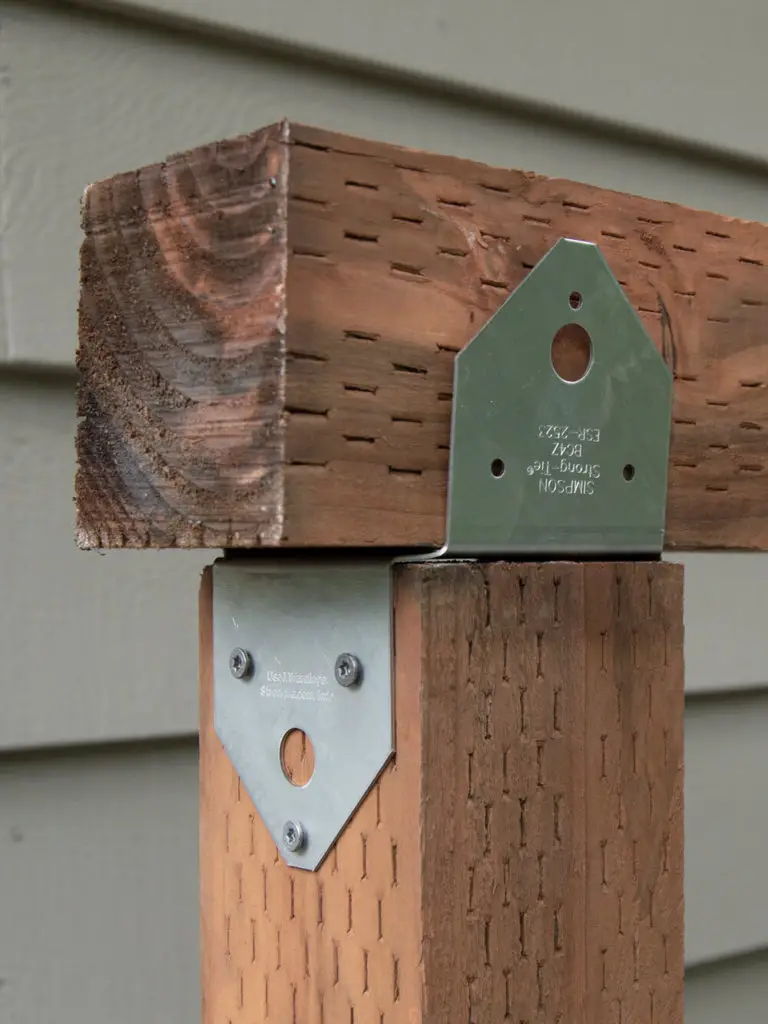
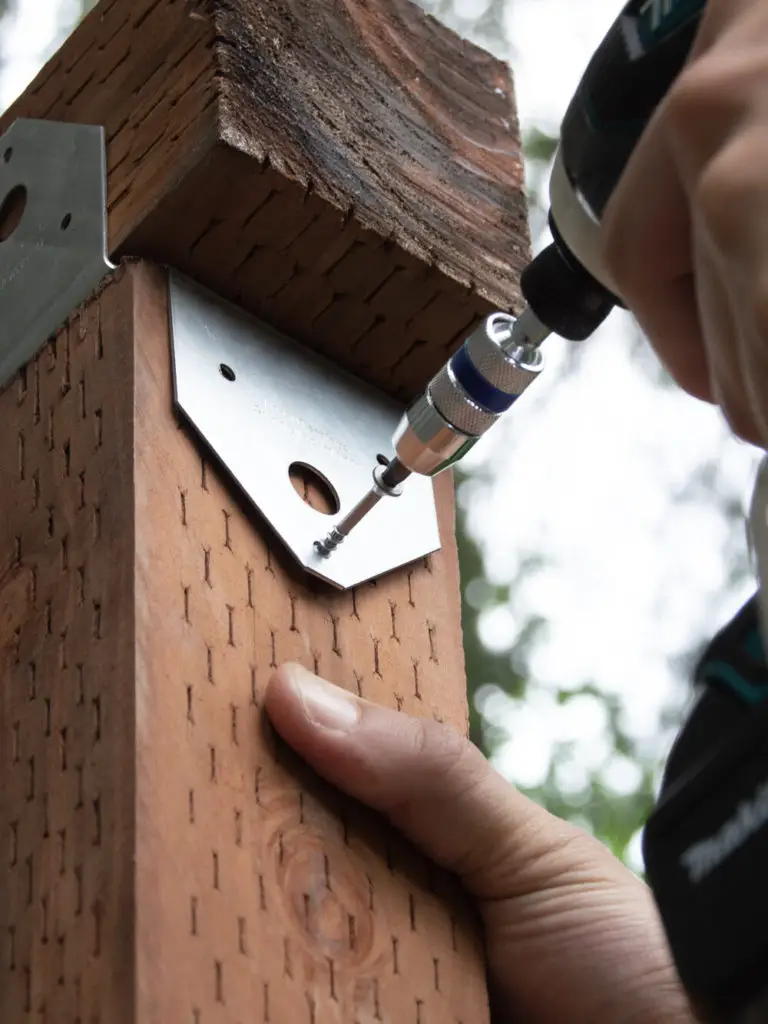
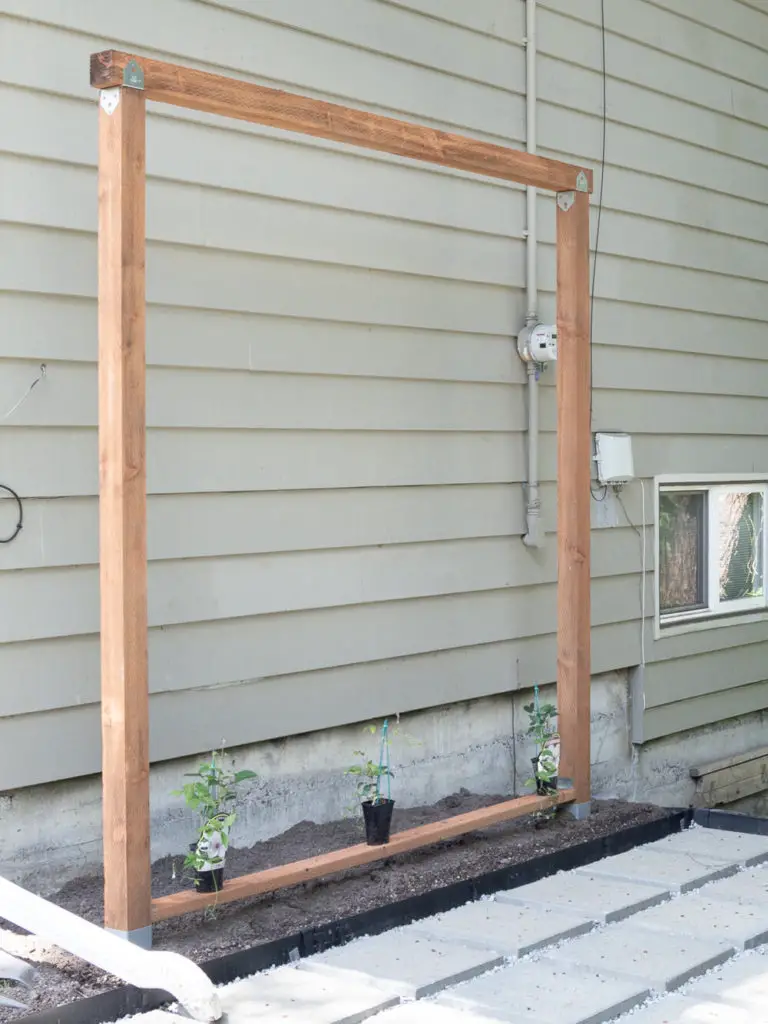
Step 4: Install the top and bottom beam
Once the vertical 4x4s are installed and secured, next is to install the horizontal beams. Depending on your plans, you might have to cut these to size.
To secure the top beam (which is another 4×4), we chose two galvanized post caps, which we secured with multiple screws. P.S… Make sure to use screws that are suitable for exterior use!
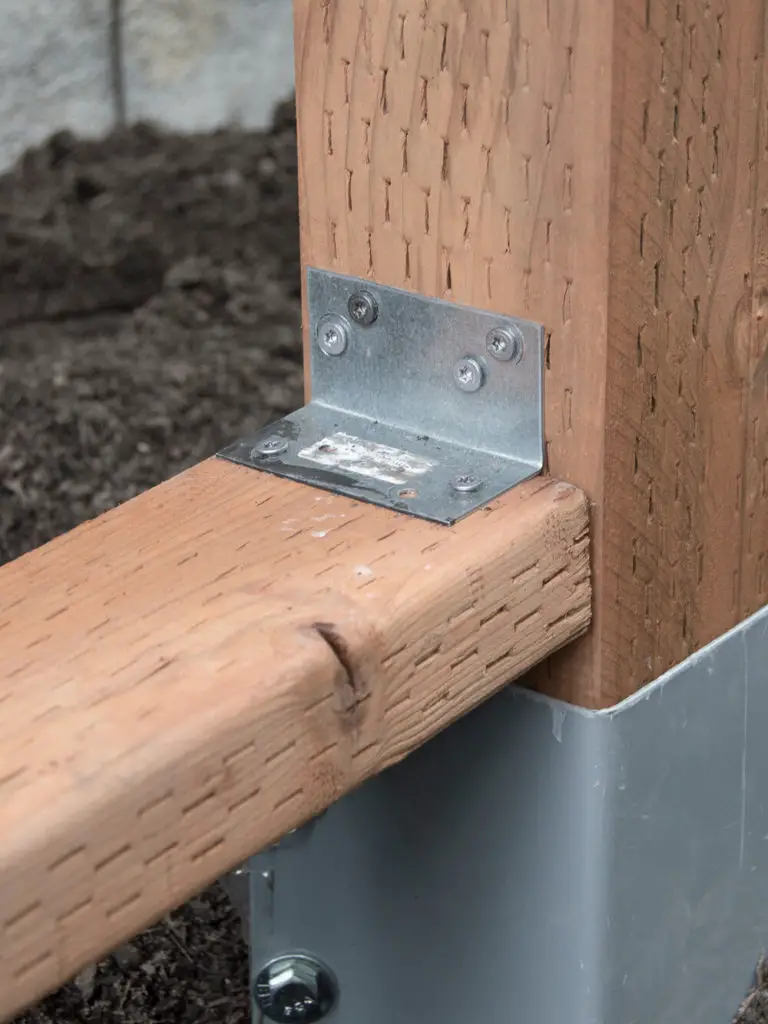
The bottom beam is a 2x4x8, and we secured it to the two vertical beams with two L brackets and more outdoor rated screws.
In hindsight, I think I would have popped on some more beautiful hardware, but oh well, hopefully it’ll all be covered in some beautiful vines soon enough!
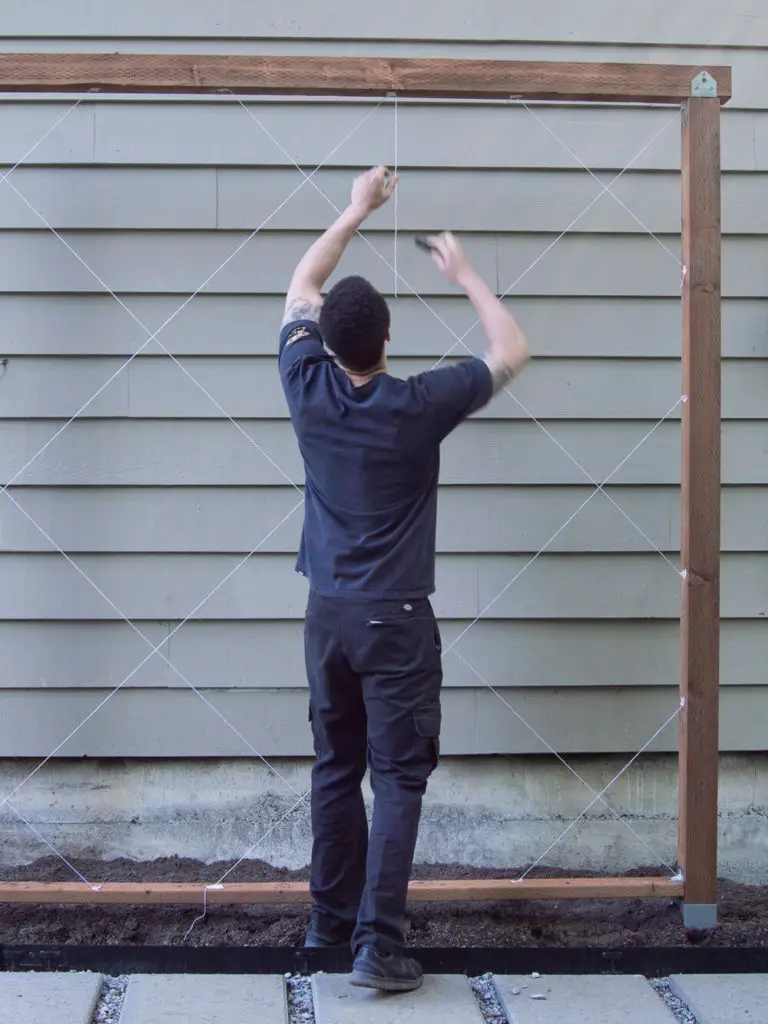
Step 5: Mock it up
Before I just dove right in and started installing the eyelets, I just wanted to do a dry run and mock it up with some tape just for good measure. I measured it out, re-measured to double check, and then marked where all the eyelets would go with a pencil.
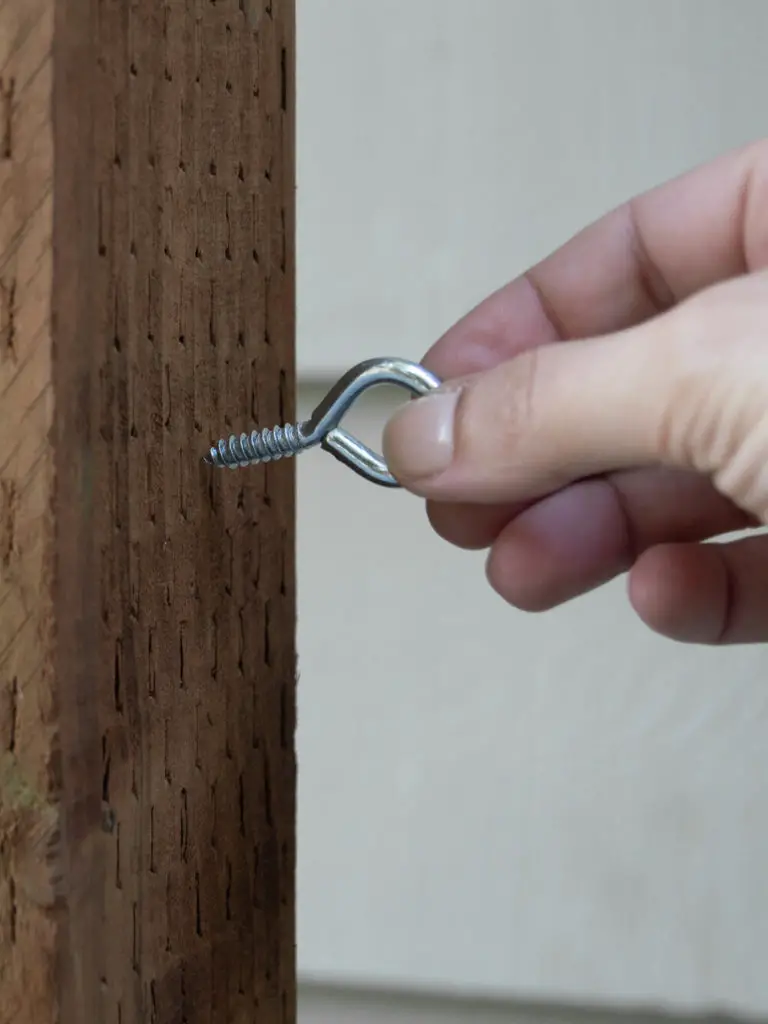
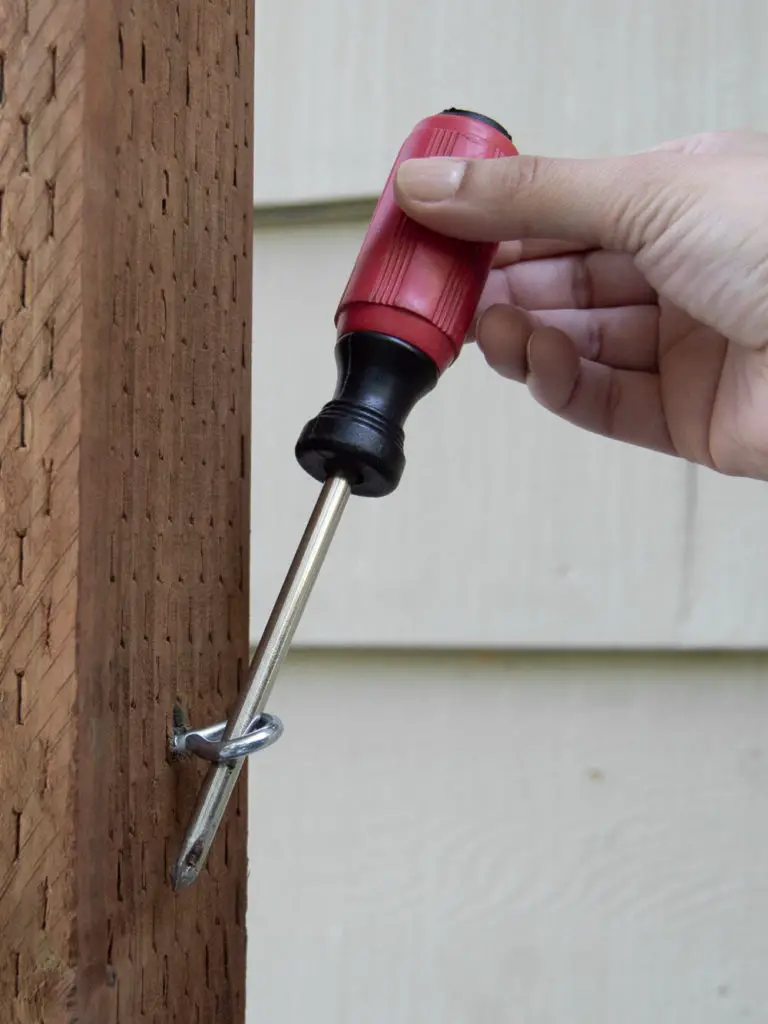
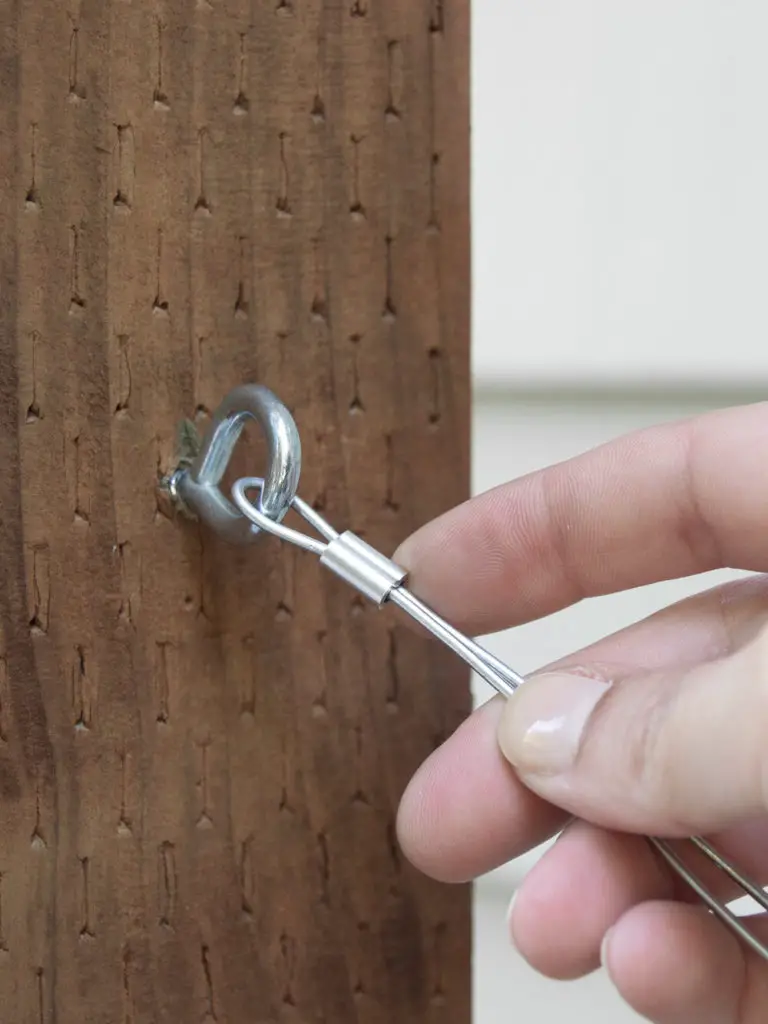
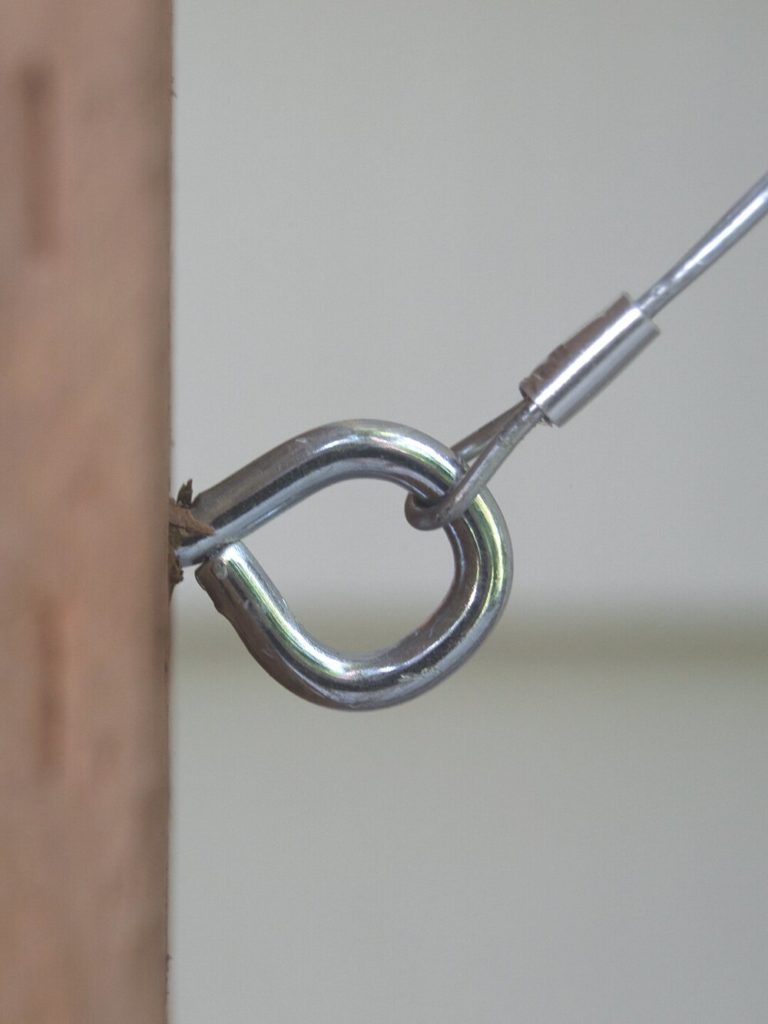
Step 6: Install the eyelets
Installing the eyelets is pretty straightforward, but here’s a hot tip! Once you have the eyelet started, grab a screwdriver, put it through the eyelet, and use it as leverage to tighten it up! You can also pre-drill the holes to make it easier, but I also found that once you had the eyelet started, it was pretty easy.
Step 7: Pre-Straighten the wire
You might not think to do this, but holy moly….it’s a lifesaver! The wire I bought was on a tight spool, so when I loosened it up, there were obviously some kinks. This is typical with any wire, and it just takes a little elbow grease to straighten it out….and don’t forget a pair of heavy-duty working gloves!
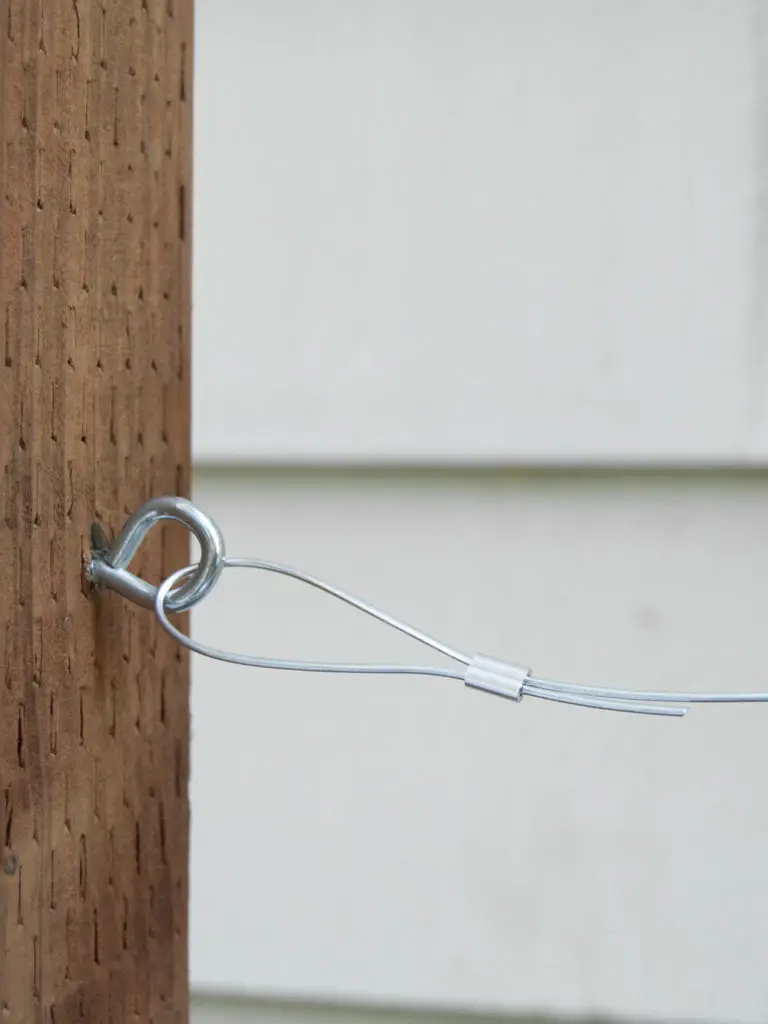
Step 8:Install the first section of wire
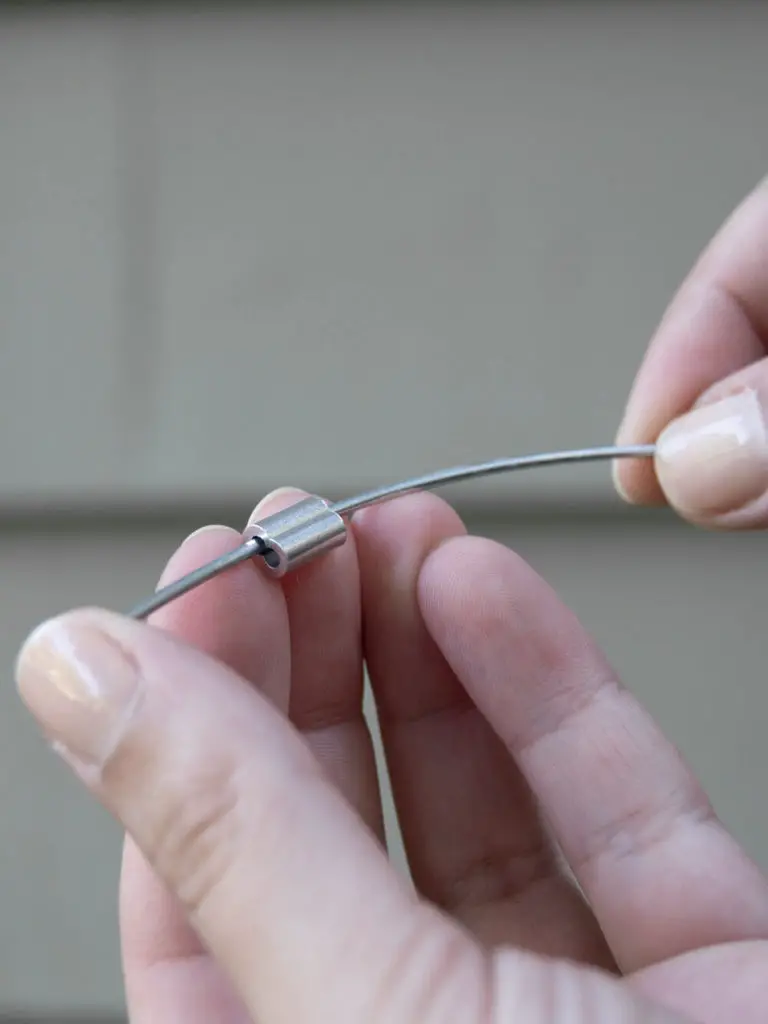
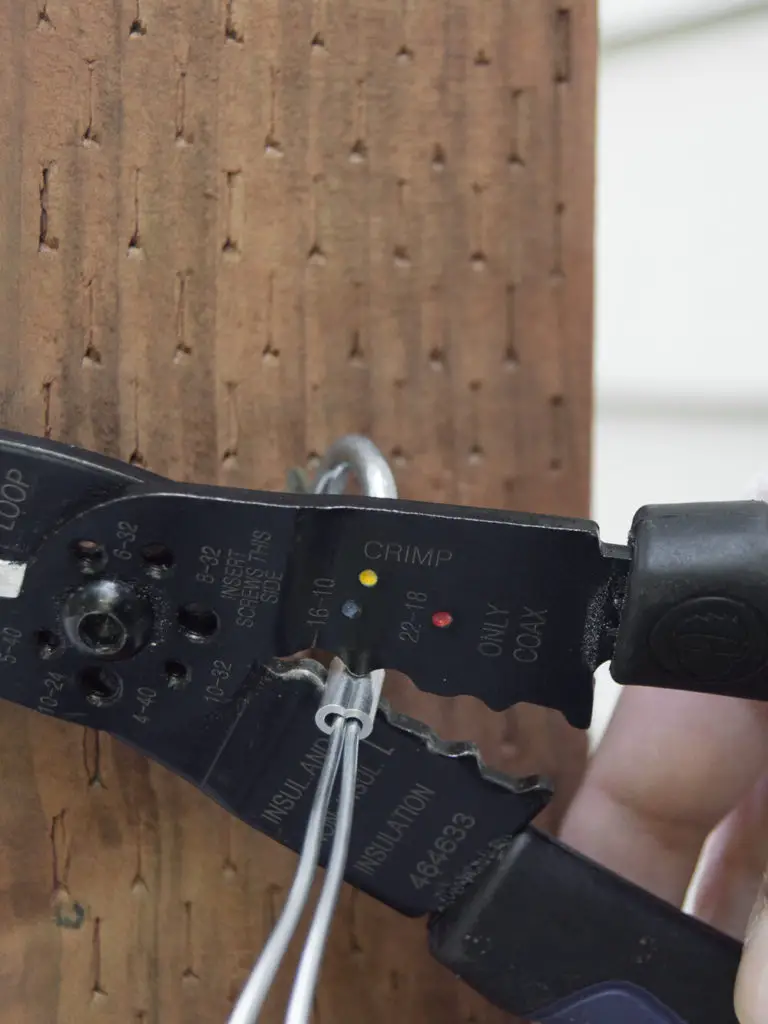
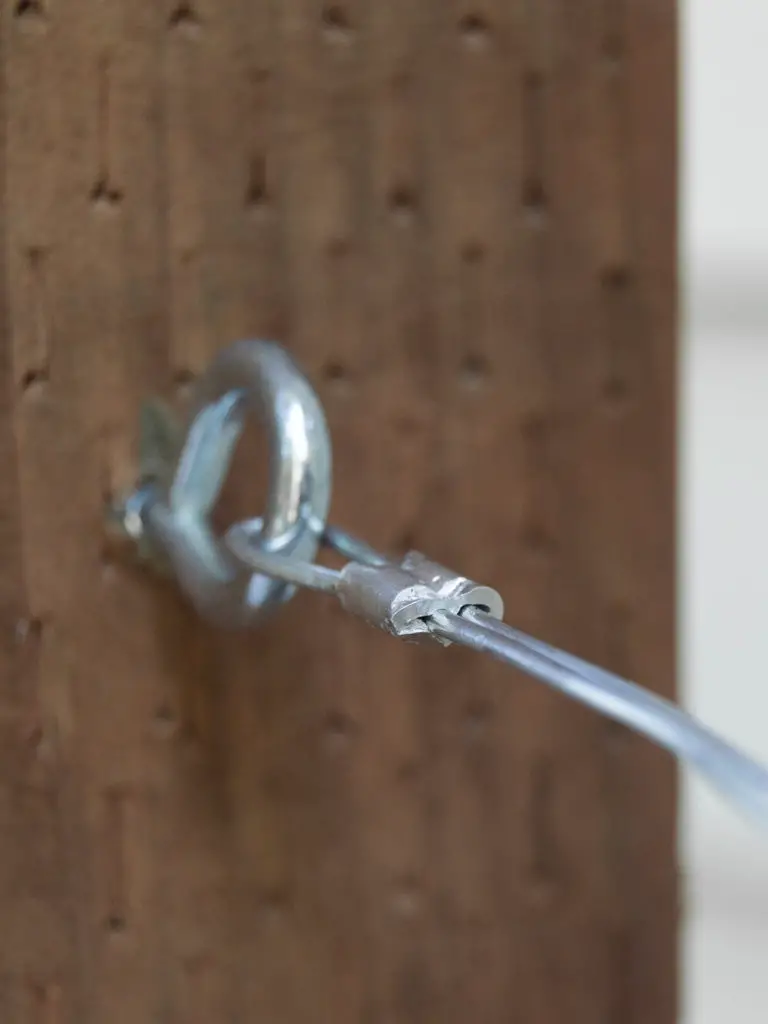
Thread one end of the wire through the ferrule, then through the eyelet, and then into the other side of the ferrule.
Try and tighten as much as possible with your hands, getting the ferrule as close as possible to the eyelet.
Use the pliers to pull it even tighter, and once it’s as close as it can get, crimp the ferrule. I found that the ferrule was easiest to crimp on the edges instead of the center.
…Oh, and another thing —- the crimper is usually on the inside of the wire cutters, but beware because not all wire cutters have it!
Step 9: Secure with a ferrule
Once one side of the wire is secure, repeat on the other side. But this time, you gotta pull it as tight as possible! Like, yank on it… hard! This also helps to straighten it a bit. After both ends of the wire are secure, I tightened the eyelets another time around with a screwdriver, and this helped to tighten the wire even more.
Step 10: Repeat until it’s complete
Installing the wire is pretty straightforward when you’re following the plans, just make sure you don’t mess one up!
I got one wire so perfectly tight and then realized it wasn’t connected in the right place. Arghh! But all in all, it actually went really quick. It took me about an hour to install all the wires by myself.
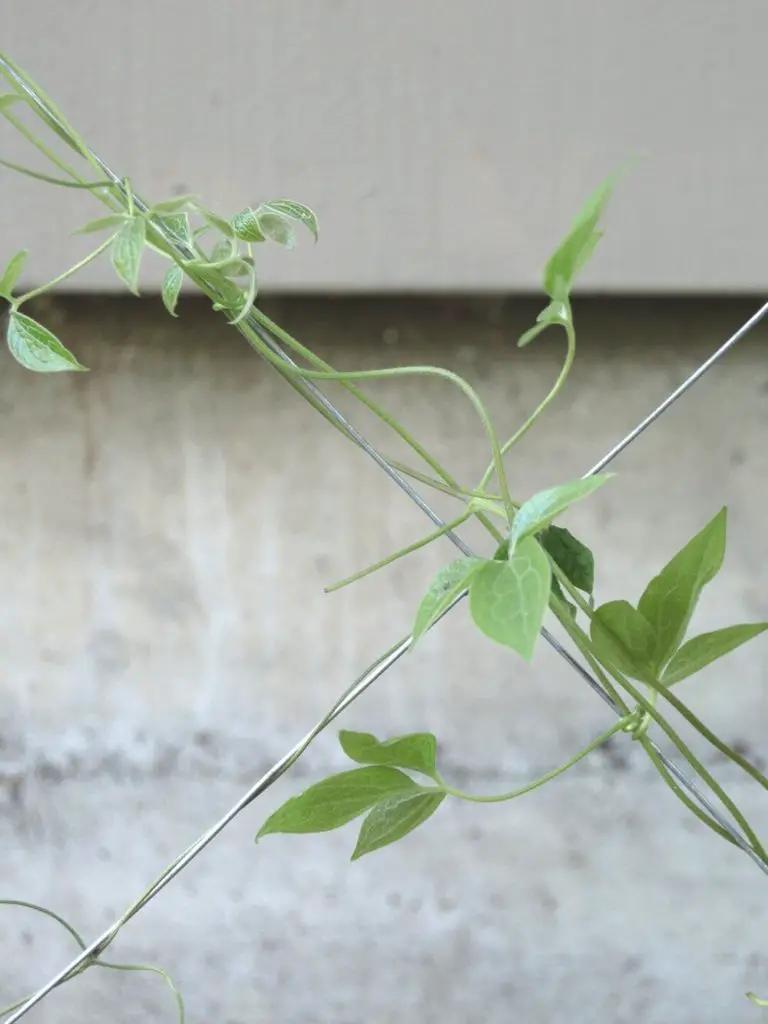
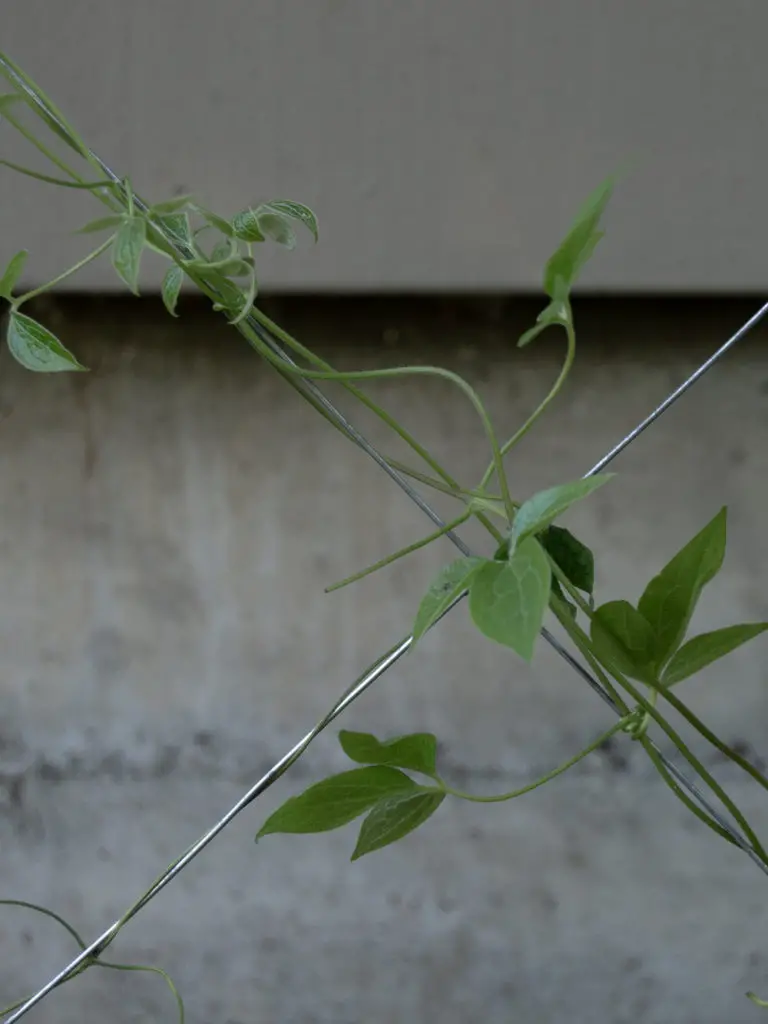
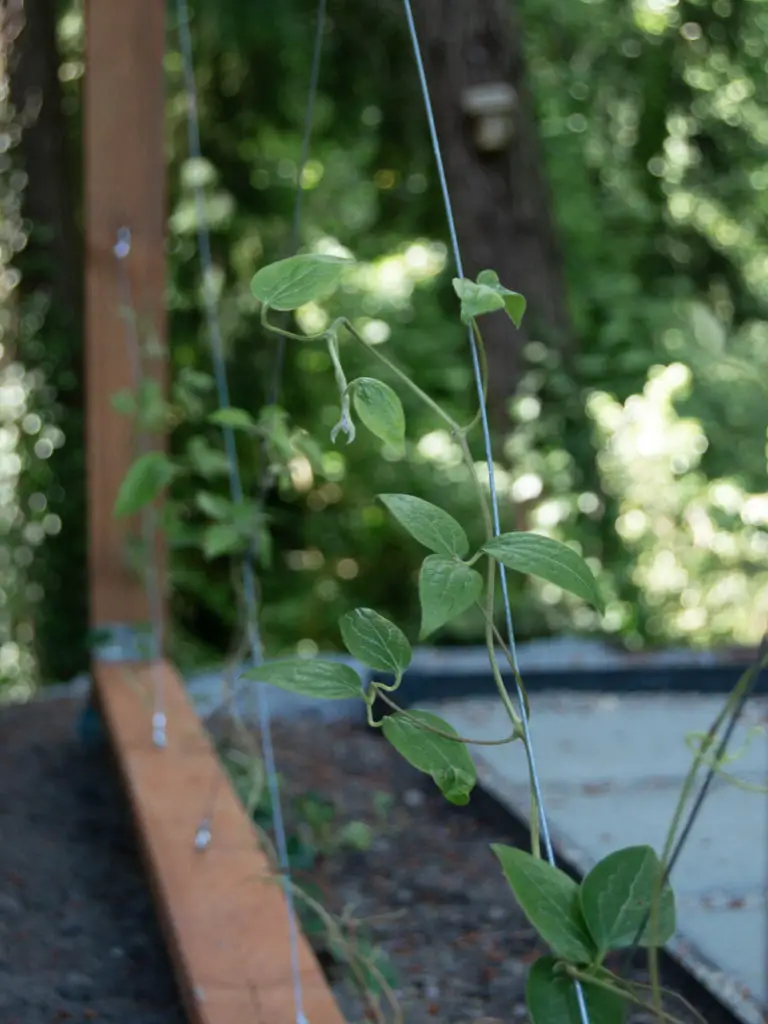
Step 11: Plant some vines or climbing plants!
For the plants, I ended up choosing Clematis Henryi, which is supposed to produce big white flowers. Like 5” wide flowers! This is partly why I made the diamonds so large.
But, as I’m writing this, I gotta tell you something…. the bunnies ate all of them! My trellis is as bare as when I started! Sooooo sad, right?!
So I’m going to have to go out and find another climbing plant that isn’t so tempting and give you another update!

Well, there you have it- all the steps it takes to make a freestanding diamond-shaped trellis.
I hope this post inspired you to make a trellis of your own or at least try something you’ve never done before!
What do you think about how it turned out?
I’ll have to give you another update once I get some new climbing plants, and show you as it starts to grow in. That’s the fun part, right?!
Until next time,
Cheers!

I made this trellis a couple of years ago and loved it! Very beginner friendly and sturdy. Now that I’ve moved, it is time to make another one. Thank you!